 » Site Navigation » Site Navigation | | | | » Recent Threads | 1999 M3 Swap 09-07-2023 10:10 PM 05-02-2024 08:18 PM 6 Replies, 371,673 Views | |  |  |  | |  01-22-2009, 12:00 AM 01-22-2009, 12:00 AM | #1 | | Senior Member Join Date: Dec 2008 Location: Los Angeles Posts: 134 |  Brake Pad replacement Brake Pad replacement
Hello Friends
It's time to replace brake pads on my 96/318ic. The warning light is lit.
Is this a DIY kinda job? I was wondering if there is a knowledgebase article for changing the pads. I searched in the knowledgebase are, but couldn't find any with detailed information. Thanks! |  |  | | 01-22-2009, 01:27 AM | #2 | | Moderator Join Date: Mar 2007 Location: Maryland Posts: 3,220 |
| | | | | 01-22-2009, 01:29 AM | #3 | | Moderator Join Date: Mar 2007 Location: Maryland Posts: 3,220 |
| | | | | 01-22-2009, 01:30 AM | #4 | | Moderator Join Date: Mar 2007 Location: Maryland Posts: 3,220 |
| | | | | 01-22-2009, 01:54 AM | #5 | | Senior Member Join Date: Dec 2008 Location: Los Angeles Posts: 134 |
Awesome!!! Thanks!! | | | | | 01-26-2009, 03:38 PM | #6 | | Senior Member Join Date: May 2005 Location: Indianapolis, IN Posts: 228 |
I recently replaced my front brakes and the most challenging part was fitting the new pads into the caliper. It took me almost an hour to figure out how to fit the new pads in; it was like a jigsaw puzzle. | | | | | 01-26-2009, 05:46 PM | #7 | | Senior Member Join Date: Jun 2003 Location: Greenville, SC Posts: 9,356 |
Quote: Originally Posted by Severian  I recently replaced my front brakes and the most challenging part was fitting the new pads into the caliper. It took me almost an hour to figure out how to fit the new pads in; it was like a jigsaw puzzle. | You are supposed to have a few beers after the job, not before. Although it is easy to install the outside pad backwards.  __________________ ...steven
BMW CCA #146825
1996 BMW 328ti 2003 MINI Cooper S 2016 M235i
www.bmwcca.org
| | | | | 01-26-2009, 07:16 PM | #8 | | Senior Member Join Date: May 2005 Location: Indianapolis, IN Posts: 228 |
lol!
In all seriousness, we ran into an issue of space inside the caliper. We could easily put one pad in, but getting the second pad in there posed a serious problem. We ended up needing to clamp down the caliper but then ease up on it to create space seemingly from nowhere.
The thickness of the pad was what did it...the details are gone though because that was during the summer. | | | | | 01-26-2009, 08:23 PM | #9 | | Senior Member Join Date: Dec 2008 Location: Los Angeles Posts: 134 |
I had to buy a brake pad spreader from Kragen (for $20 )to push the brake piston all the way back. This will give more than enough room for the new pads something similar to the one in this picture http://www.autobarn.net/lis24400.html replacing the pads were easy as a breeze. Removing the wheel was my biggest challenge though. The front driver side wheel didn't want to come out because of rusting. Had to spray plenty of brake cleaner and a lot of kicking. I missed the beer part. That would have helped me with my boy ache. I was so tired after fighting with the front wheel and I totally forgot about the Beer  | | | | | 01-27-2009, 01:41 AM | #10 | | Senior Member Join Date: Sep 2007 Location: asdfasdf Posts: 10,002 |
Quote: Originally Posted by applefan I had to buy a brake pad spreader from Kragen (for $20 )to push the brake piston all the way back. This will give more than enough room for the new pads something similar to the one in this picture http://www.autobarn.net/lis24400.html | just get a C-clamp or Vise Grip pliars with ends like this: 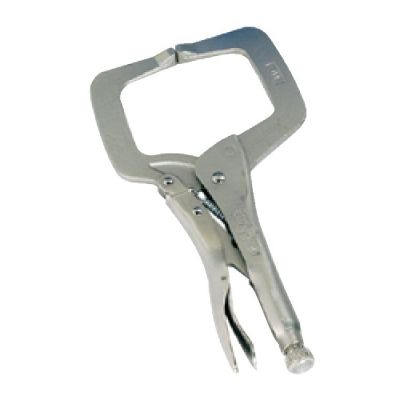 | | | | | 01-27-2009, 03:07 AM | #11 | | Senior Member Join Date: May 2005 Location: Indianapolis, IN Posts: 228 |
I used a C-clamp | | | | | 01-28-2009, 04:24 PM | #12 | | Senior Member Join Date: Jan 2009 Location: Burlington, NJ Posts: 560 |
C-clamp FTW when doing brake jobs! __________________ 1996 318ti - 2000 Z3 2.3 - 2012 MINI Cooper Hatchback  | | | | | 01-30-2009, 10:22 PM | #13 | | Junior Member Join Date: Aug 2007 Location: NC Posts: 16 |
I just did my first brake job and it is definitely in the DIY area. I replaced the rotors too, they are cheap enough. Also, I'd suggest the brake fluid flush.
There will be plenty of help in this forum if you need it.
PM me for the supplier if you want. | | | | | 01-30-2009, 11:57 PM | #14 | | Senior Member Join Date: Dec 2004 Location: Long Beach area Posts: 1,189 |
I just did this earlier today just to put antisqueal on the pads hahah...
Took me less than 2 hours to do, and I took my time.
This is just to replace the brake pads ONLY
1: Lift up the car
2: Remove wheels
3: Remove brake pad wear indicator if needed (On the driver's side front and passenger's rear). Use long nose pliers for the least amount of damage to the sensor.
4: Remove the plastic caps for the guide bolts
5: Remove the guide bolts themselves using an Allen key (I don't know the exact size, but I had it in my tool set)
6: Remove Anti-Rattle Clip
7: Pull caliper straight out (towards the car's rear) and remove pads
8: Push in piston using whichever method you prefer(I have a tool for the calipers to push the piston in)
9: Install new pads
10: Installation is reverse of removal.
11: Repeat for the other 3 wheels.
Torque specs for the guide bolts are 22 ft-lb.
Happy DIYing!
-Randy __________________ 97 Jet Black 318ti Sport. Not so stock anymore!.... 
Now Featuring:318ti.org sticker  Now featuring: Hartge exhaust|Blacked out Grilles|Front Clear Corners or Ambers depending on how I feel|325is vented front brakes|Bilstein Sports|H&R Sports|E46 RSMs w/ Z3 reinforcment plates|16" Style 45s|17" E46 M68 rims|18" Authentic Hartge Classics C|OEM M135 ZHP wheels Now featuring: Hartge exhaust|Blacked out Grilles|Front Clear Corners or Ambers depending on how I feel|325is vented front brakes|Bilstein Sports|H&R Sports|E46 RSMs w/ Z3 reinforcment plates|16" Style 45s|17" E46 M68 rims|18" Authentic Hartge Classics C|OEM M135 ZHP wheels
and
99 Titan Silver 323is Dinan S1+few more mods
Coming sometime in the future:...SCed 2.1...new (to me) car mod maybe?...all in one car | | | | | 02-02-2009, 07:39 PM | #15 | | Junior Member Join Date: Jan 2009 Location: D-ville, GA Posts: 15 |
Yeah, you usually shouldn't pad-slap your bimmer. If you decide to just do pads (not recommended), at least pull the rotors and get them turned...FWIW | | | | | |
| Currently Active Users Viewing This Thread: 1 (0 members and 1 guests) | | |
 Posting Rules Posting Rules | You may not post new threads You may not post replies You may not post attachments You may not edit your posts
HTML code is Off
| | |
|


 Linear Mode
