The dove Vader seats in my coupe were cracked, worn through in spots, and filthy. So what to do? These seats are becoming rarer and more expensive everyday and the newest examples are over 10 years old, so a refresh was the best option for my seats…
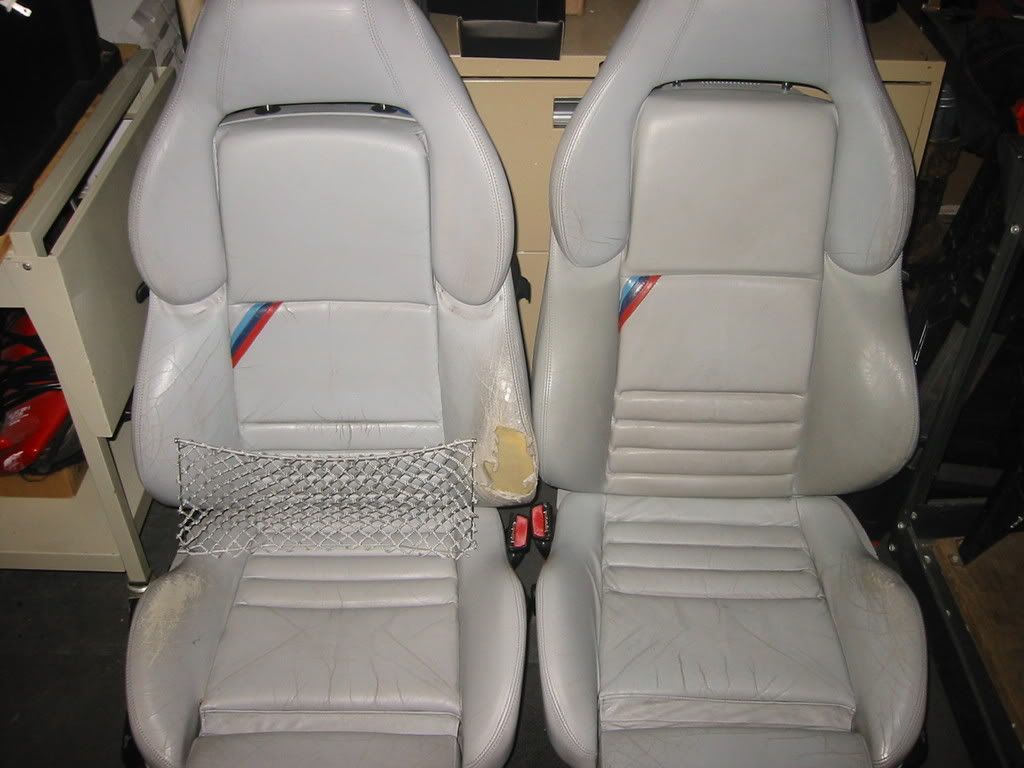
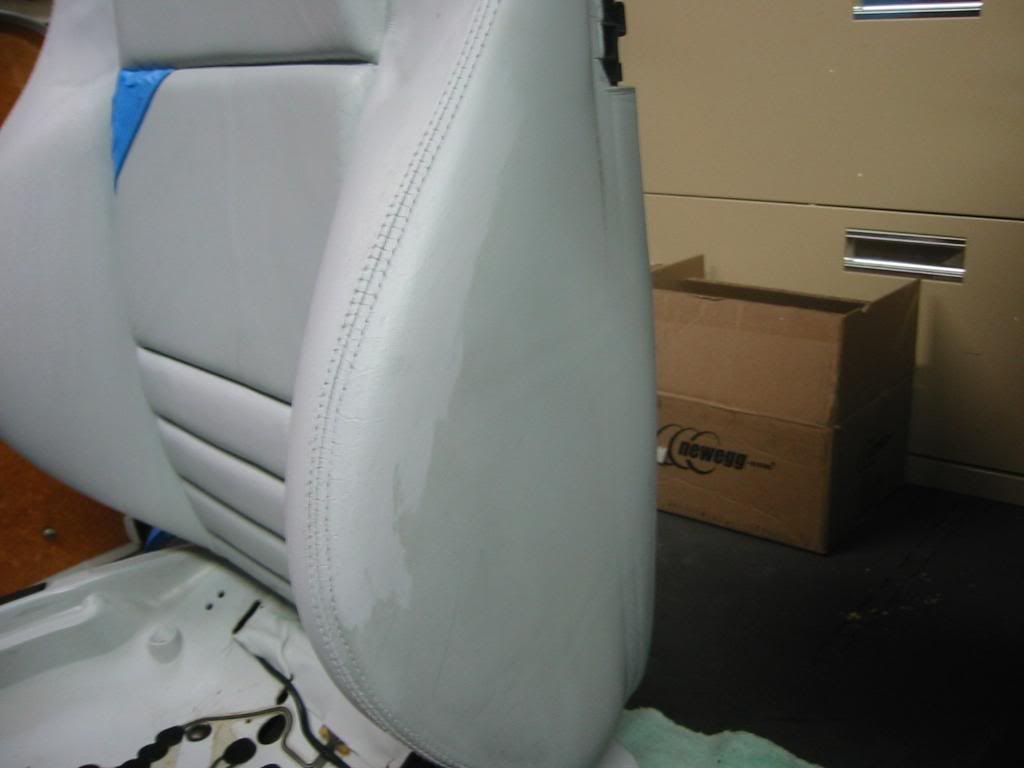
The dove seats were very beat up and looked like they had never been properly cleaned. One of the upper side bolsters was completely worn down to the suede, and the other one was torn through. (This one I had to replace.) The lower bolsters were also worn, as were the headrests and thigh supports. There were also minor color variances between the seat parts, due to age and different dye lots. This meant a full re-color as well as re-finish.
Here are the products and tools I used;
Leather World Deluxe Leather Repair and Recolor kit, including
Leather Master leather filler, Leather World Dye Colorant, and Leather World Finishing Conditioner, all available at;
http://www.leatherworldtech.com/Prod...productid=DLRK The 8 oz. bottle of colorant was sufficient to do both front seats and the rear lower seat bench. The one tube of leather repair filler was sufficiant for all the repairs to the seats.
Also used;
A good quality paint brush and several disposable brushes
Very fine sandpaper (220 grit or higher)
Nylon scrub pads (made for pots and dishes, etc.)
Painters tape
Soft, lint-free cloths
Assorted tools to remove and disassemble the seats
Here are the steps I took;
Removing and disassembling the seats is the way to achieve the best results. You can try doing this with the seats in the car, but it will be a lot more difficult to achieve the same results.
Disconnect the battery to prevent the dreaded SRS Airbag warning light. Wait at least 15 minutes before unplugging the wires from under your seats.
Remove the headrest from the seat. It will pull right out, but could require some force. This can be done easiest by getting in the back seat and pulling the headrest off (don’t hit yourself in the face!).
Unbolt the 2 16mm rear bolts and the 2 16mm front nuts that hold the seat rails to the floorboards.
Tilt the entire seat assembly back to expose the electrical connections, and unplug all the connectors (Airbag sensor, seat belt receptacle, seat heater wiring, etc.). Now you are free to remove the seat from the car, but be careful, as they are heavy and awkward.
To remove the lower seat section off the seat frame, remove the 2 Torx screws on the front and 2 plastic pins in the back (which I just broke off, as the pins are not designed to come out. I replaced them with #10 sheetrock wall anchor and screw). There are 4 more Torx screws holding the extendable thigh support to the lower seat frame, which also need to come off. Flip the lower seat section upside down toward the front of the seat to expose and remove those screws, then lift out the entire lower seat section.
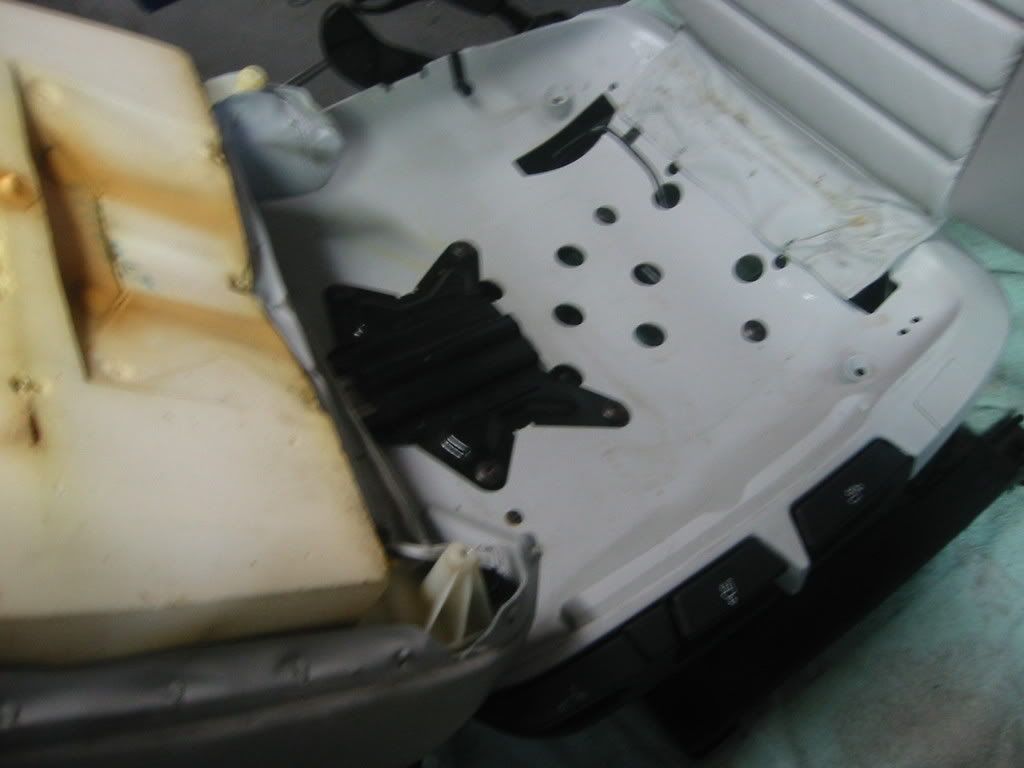
I also removed the back clamshell from the seats during this process. This is held in place with the headrest (already removed), two torx screws on the lower corners of the seat back, and the side lever(s) that flip the seat forward. The side levers and trim are both just pop off items, done carefully with a small, thin flathead screwdriver or prybar. Both should come straight out. (If the Bowden seat-back release cable is broken, now is the time to replace that, since you have full access.)
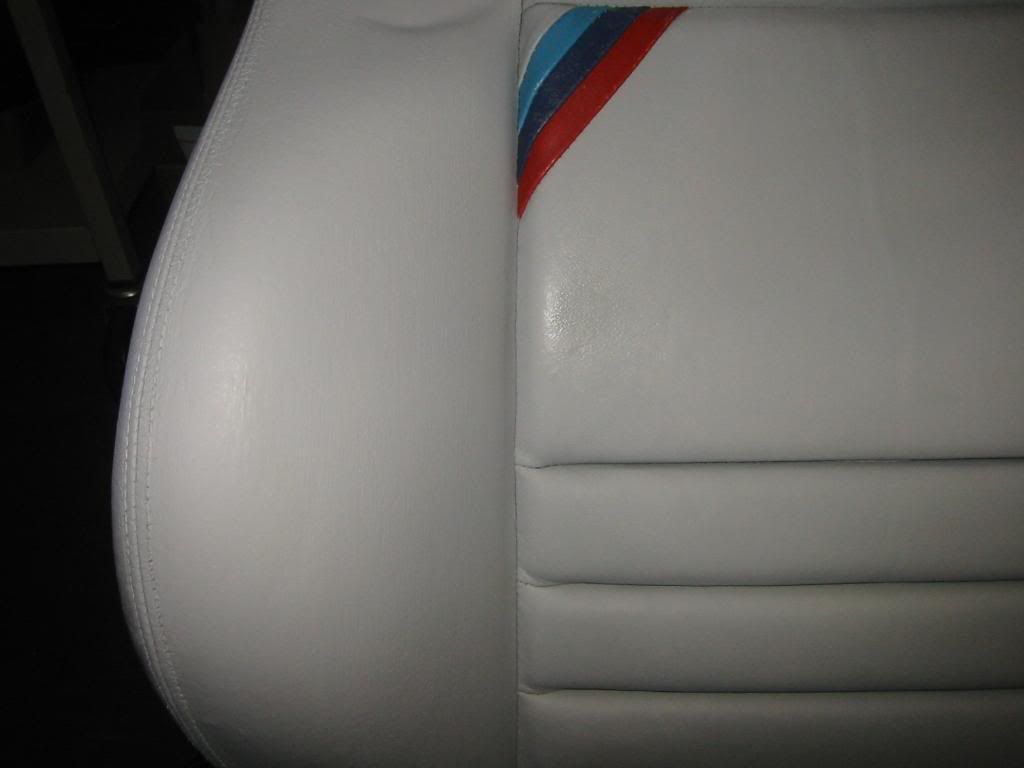
1. Prepping the seats for re-finishing involved getting all the dirt, oils and grime off, then prepping the surface. Mild dish or hand soap is good to get the surface clean, just don’t get the surfaces too wet. A damp cloth or sponge is all you need to clean with and then scrubbing the surface with a nylon scrub pad gets most grunge off and preps the surface. Then using a mild alcohol-based cleaner in a spray/spritz bottle, spray the surface and wipe clean. Once it’s completely dry, the leather is ready for re-finishing. I also taped off any area that wasn’t going to be re-finished (the M /// for example) with a good quality painters tape.
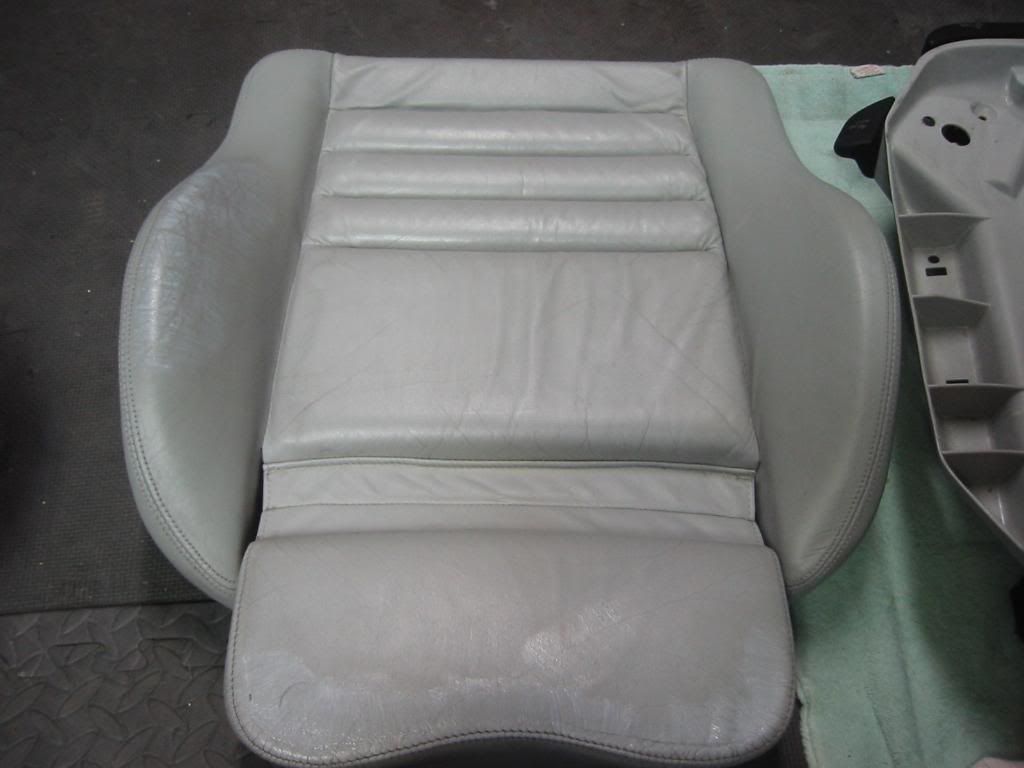
2. Using the flexible leather filler product, I started with the side bolster that was down to the suede. (The key here is to apply the filler in very light coats, and then sand the area in-between applications. I cannot repeat this enough. This will ensure you get good adhesion and a smooth finish.) The filler has the consistency of Elmer’s Glue and so I “painted” it on the seat using a disposable brush. It took at least 6 light coats of the filler to cover the sueded area of the leather, with a very light sanding between each coat.
Always wipe the area down after each sanding to remove any dust or debris. Then I used the filler and “painted” the lower bolsters, the thigh rest, and filled in the creases and fine cracks, again with multiple light coats. Also, try not to get the filler on any stitches or seams, as it would fill them in and look poor. The filler goes on white, then dries clear, so be sure to look closely to ensure you have completely filled in the area you are working on.
3. The dye finish has a very thin and watery consistency, allowing for either a brush or spray application. The first coat should not completely color over the repaired area (if it does, you’re putting it on too heavy). It should be streaky and thin. Let each coat dry, wipe the area with a dry cloth, and then apply the next coat. (Again, be extra light on the seams, so they don’t get filled in.) I painted 3 to 4 light coats of color with a fine brush, and then finished with a spray coat.
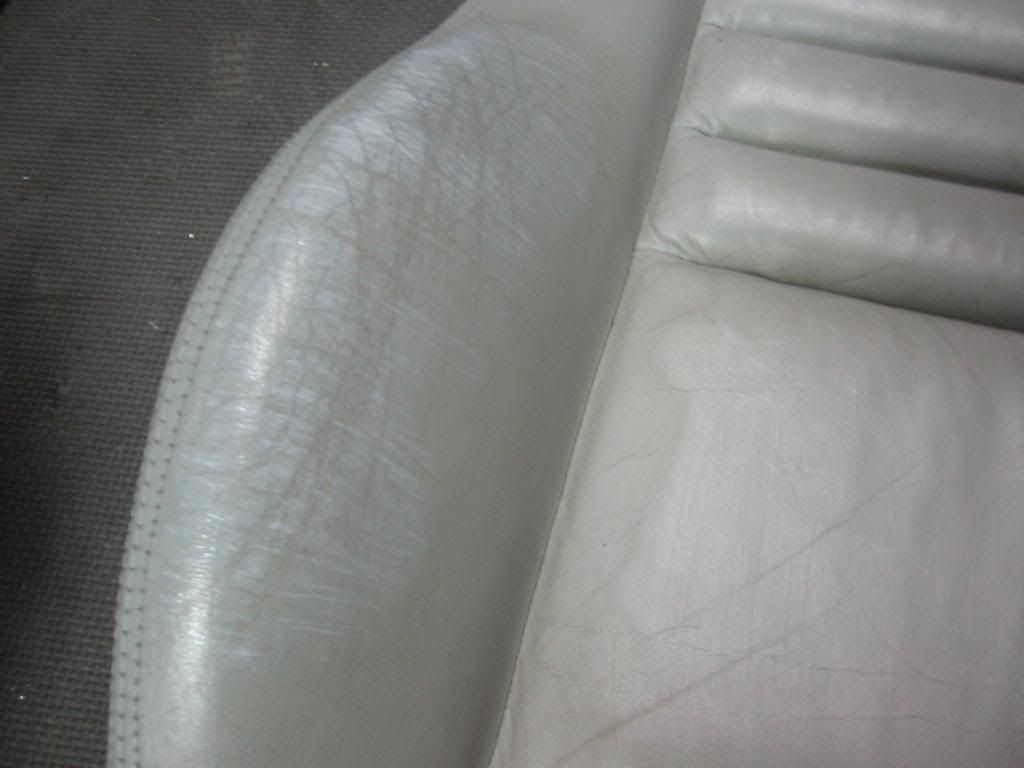
This bolster below was worn down to the suede, no finish;
I was worried that this would look bad, but the filler did a great job... If you looked close you could still see brush marks after my first attempt. I did more sanding and refinished the area a second time to complete the transformation
4. After the dye finish has cured for 24 hours, apply the finishing conditioner in light coats to the entire area, gently rubbing it in with a soft cloth.